Esta é uma versão antiga do documento!
Distribuição
O modo de distribuição apenas estará disponível se o local estiver configurado corretamente no servidor. Veja como configuraraqui
Pacientes
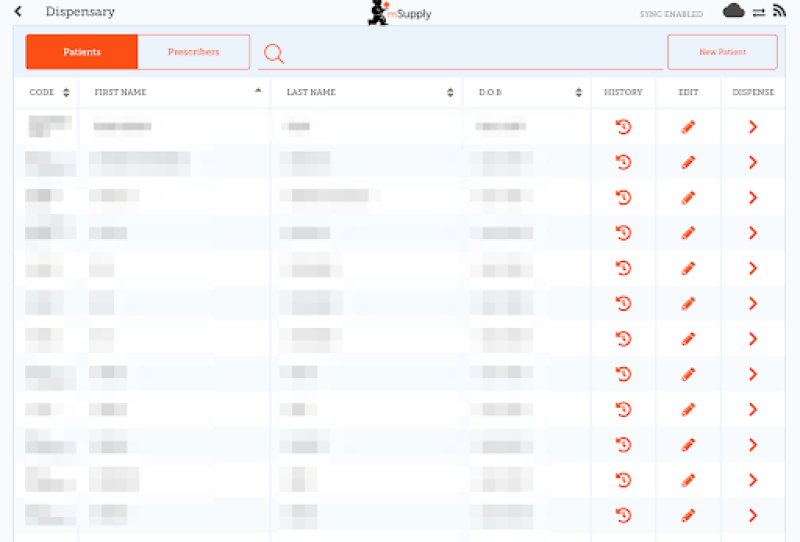
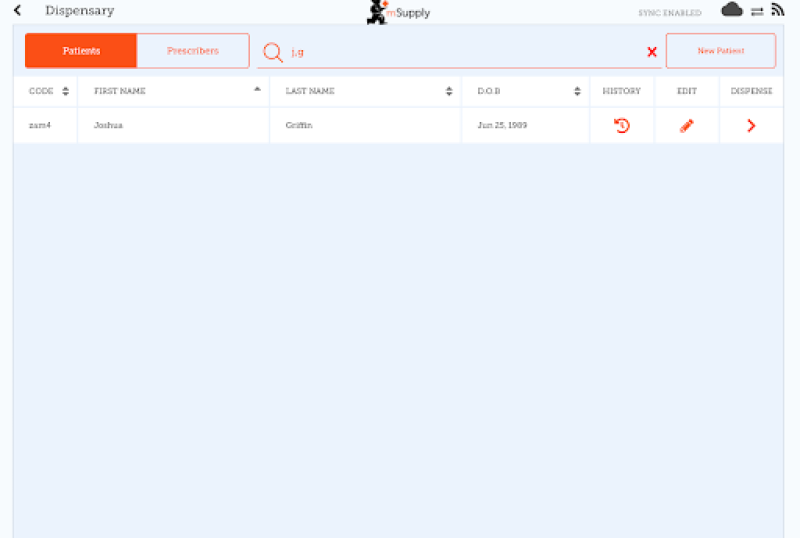
Ao clicar no ícone para Distribuição (Dispensary) você será apresentado a lista de pacientes (patients). Você poderá pesquisar por um paciente usando o campo de texto e digitando a busca.
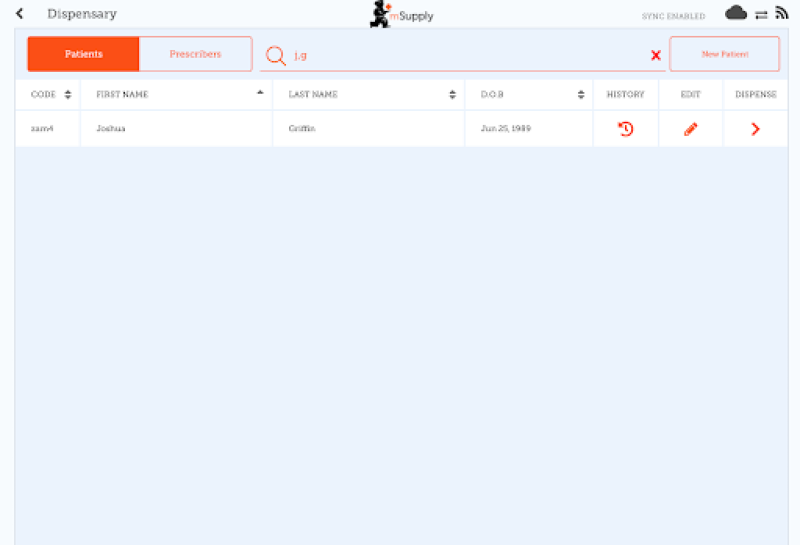
Dica: Você pode pesquisar pelo primeiro nome e sobrenome usando a vírgula entre eles. Por exemplo: g, j irá pesquisar por todos os pacientes cujo o sobrenome começam com G e o primeiro nome começam com J.
Adicionando um novo Paciente
- Para criar um novo paciente, clique no botão Novo Paciente
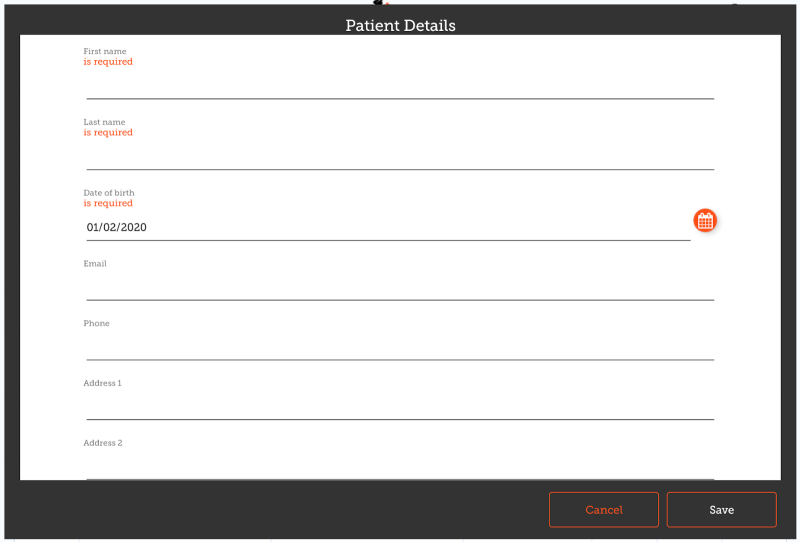
- A tela para criar paciente será aberta
- Os campos marcados com CAMPO OBRIGATÓRIO devem ser preenchidos.
- Os demais campos são opcionais.
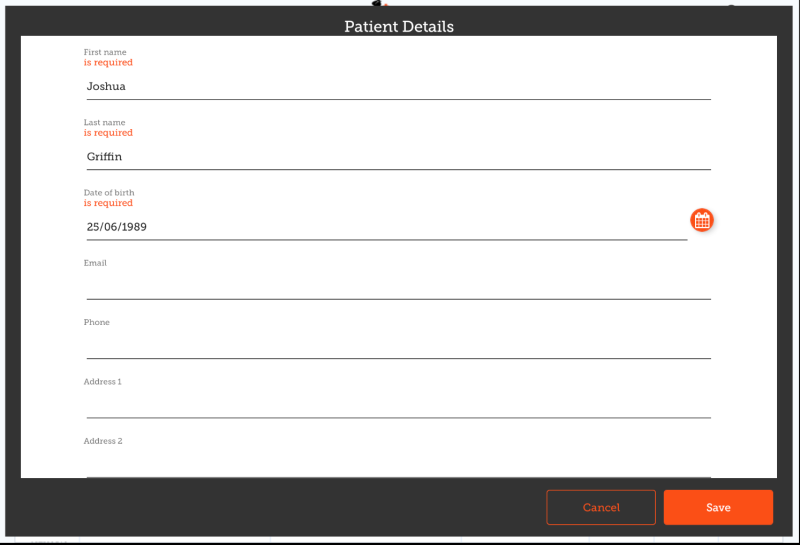
- O botão para salvar somente estará habilitado quando todos os campos obrigatórios estiverem preenchidos.
- Assim que todos os detalhes do paciente forem preenchidos, clique no botão Salvar (Save)
Editando os detalhes do Paciente
Para editar os detalhes do Paciente, clique no ícone da linha deste paciente da coluna Editar (Edit).
Visualizando o histórico do Paciente
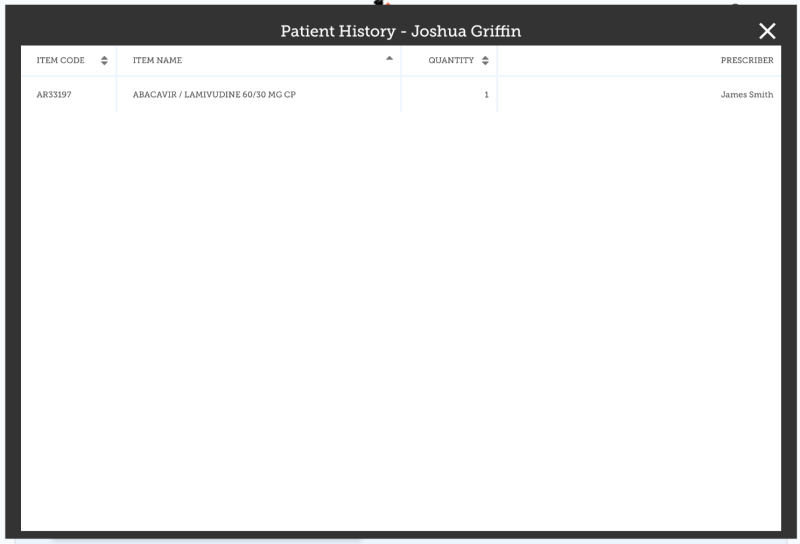
Você também pode visualizar o histórico de prescrições ao clicar no ícone da linha deste paciente na coluna Histórico (History).
Prescritores
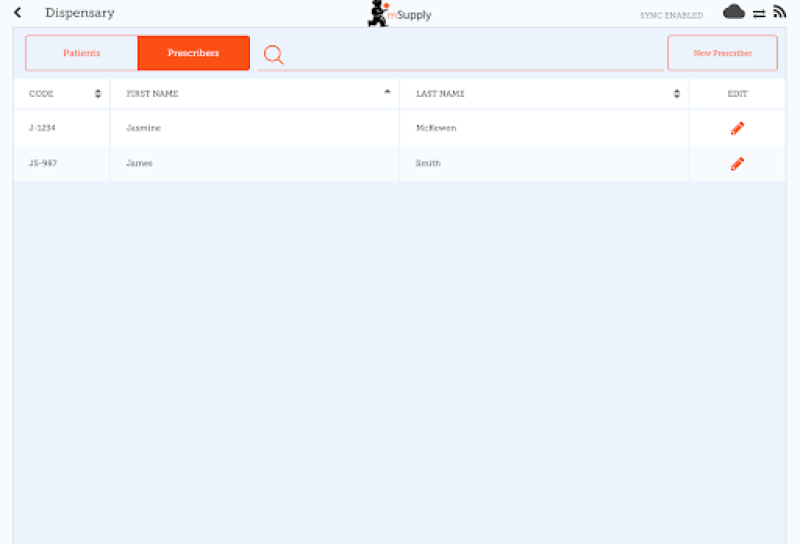
Você poderá visualizar, editar e adicionar novos Prescritores da mesma forme que mostramos para Pacientes.
Para visualiza-los clique na aba “Prescritores” (Prescribers) na area superior esquerda do ecrã:
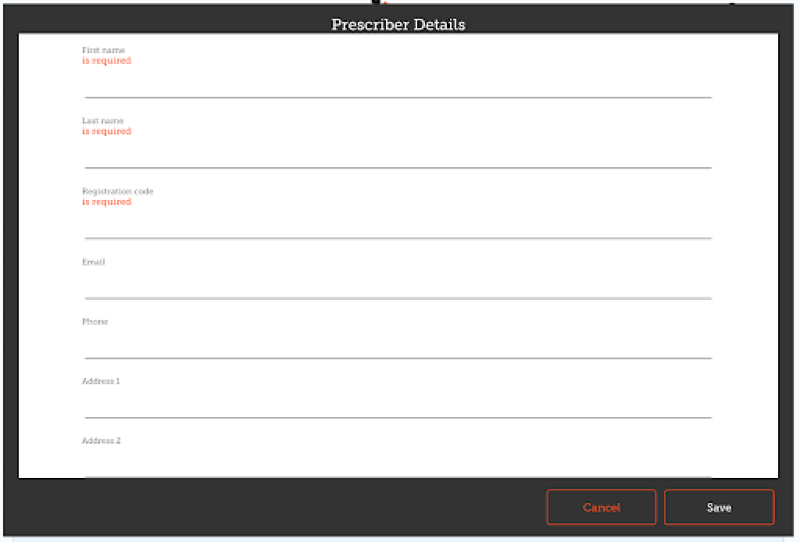
Para editar um Prescribers, clique no ícone da linha deste prescribers na coluna Editar (Edit). Ao clicar você será apresentado a uma tela com os detalhes do Prescritor:
Assim como na tela de pacientes, quando você inserir todos os campos necessários você poderá salvar o registro.
Distribuição para pacientes
- Primeiramente, encontre o paciente para quem será distribuído medicamentos (usando o campo de pesquisa ou arrastando o dedo na tela até encontrar o nome procurado).
- Agora clique no ícone da linha deste paciente na coluna Distribuir (Dispense).
A distribuição é feita em 3 etapas. Cada passo deve ser completado antes de seguir para o próximo passo.
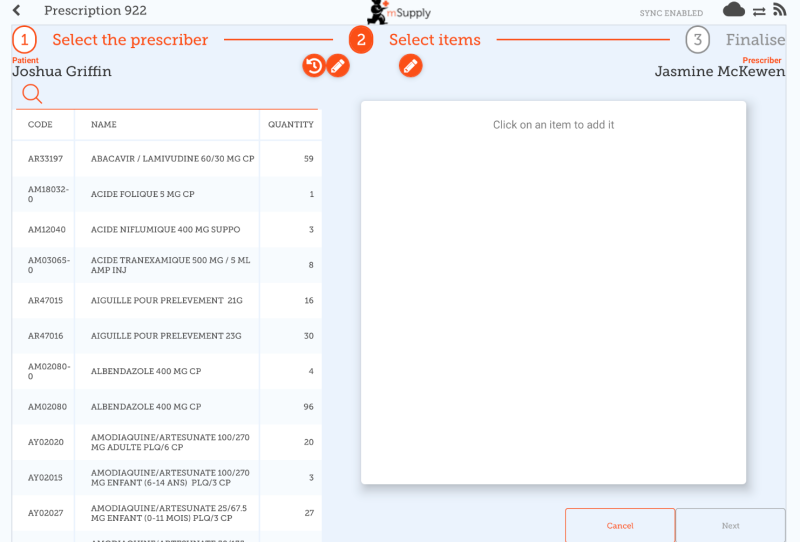
- Passo 1: Você deverá selecionar um Prescritor ao clicar no ícone de SELEÇÃO
- Note: Você poderá clicar sobre os ícones HISTÓRICO ou EDITAR próximo ao nome do paciente para editar os detalhes deste paciente ou para ver o histórico de prescrições
- Você pode pesquisar por Presritores usando o campo de busca
- Ao selecionar um Prescritor, você poderá editar este prescritor a qualquer momento clicando sobre o ícone de EDITAR próximo ao nome do Prescritor.
- Passo 2: Você deverá selecionar itens para distribuição ao clicar sobre os itens na lista da area esquerda do ecrã. Você também pode pesquisar por itens usando o campo de busca
Você deve selecionar pelo menos um item antes de continuar.
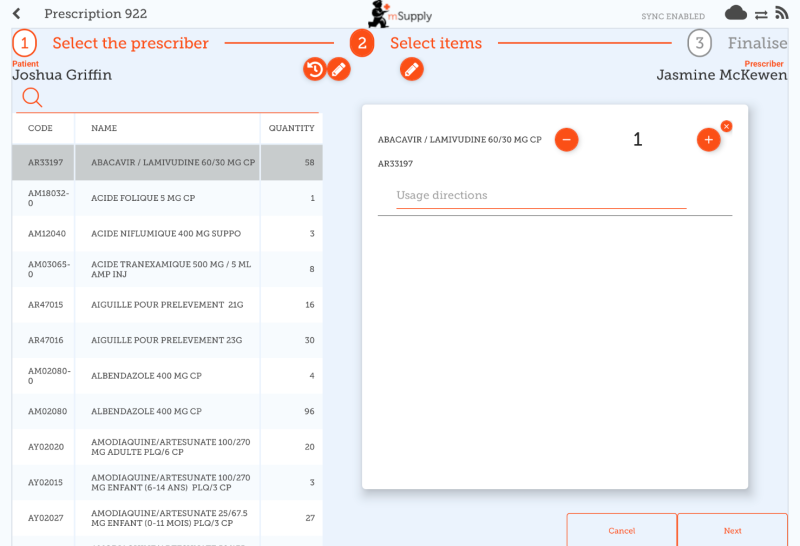
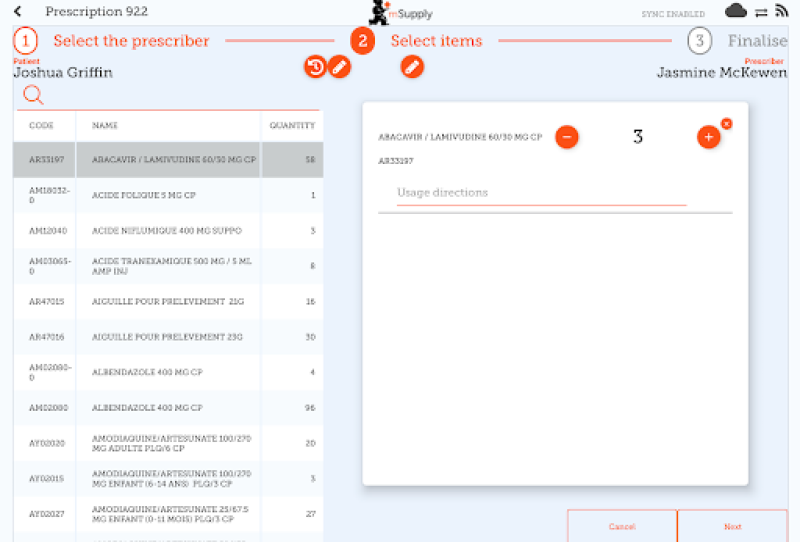
Após selecionar um item, você poderá ajustar as quantidade usando os botões + e -, ou digitar a quantidade no campo de texto (clique sobre o campo para o que teclado apareça).
Você poderá remover itens usando o botão X.
Digite indicações para uso no campo de texto indicações (directions).
Quando estiver atualizado a quantidade, o botão Próximo (Next) está habilitado para que você siga para o passo 3.
Observe que se você clicar em Cancelar (Cancel), ou no botão voltar a prescrição será DELETADA.
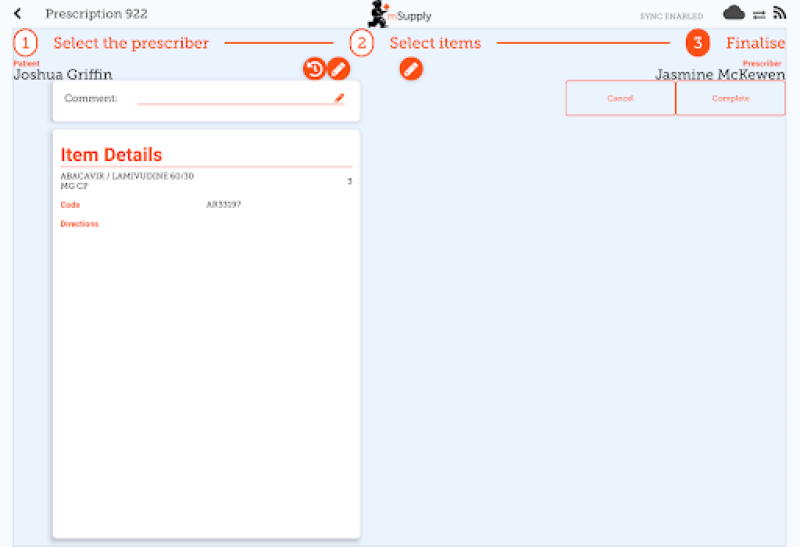
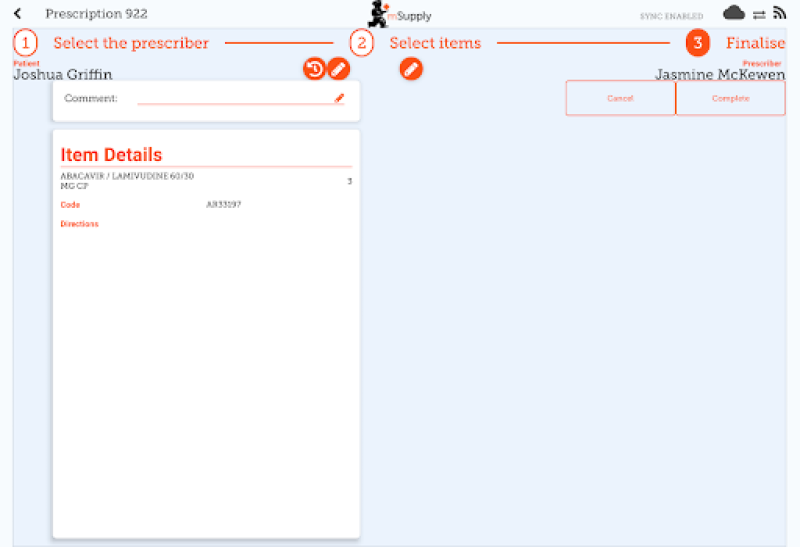
- Step 3: You can view the final results of the prescription and add any other details such as a comment.
Tapping the Complete button will finalise the prescription. That means that it's locked- you can't edit it any more.
That was easy!. If you've enabled payments, you can go to the next step to receive payment. If not, you'll continue and dispense the next prescription.
Payments
The payments module needs to be configured on the server, so if it's turned off, you won't see it. Configuration instructions are here The 2 configuration settings that must be set to “true” are:
- usesDispensarymodule
- usesPaymentsmodule
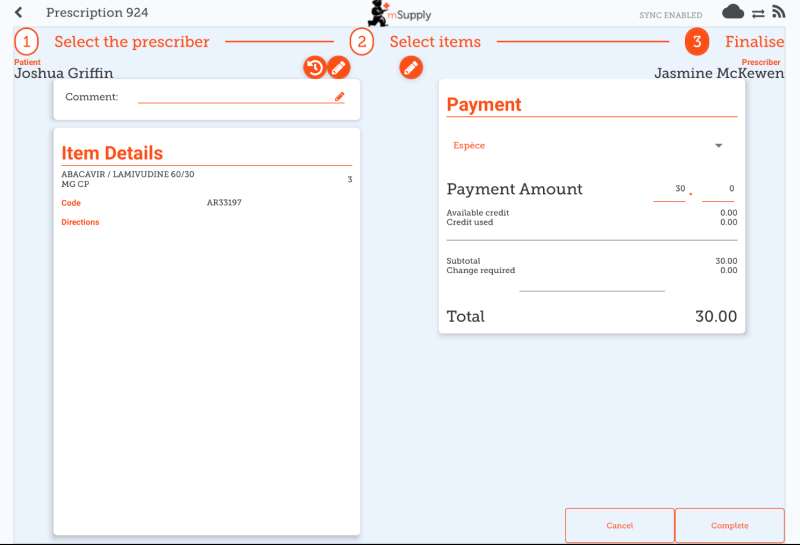
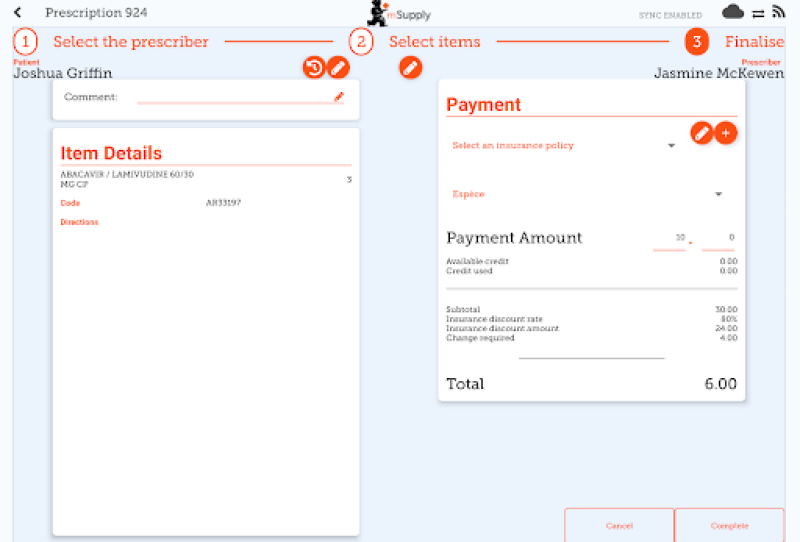
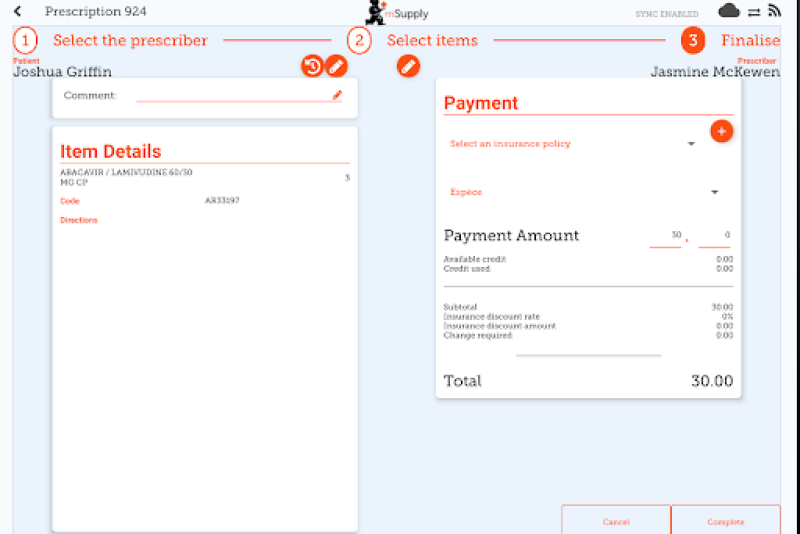
Once enabled, when you arrive at the summary page where you check the details of a prescription, you will be shown a payment summary and each item will show its price:
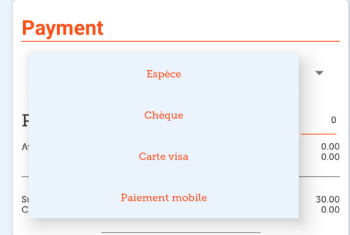
The dropdown list under the “Payment” allows you to select the type of the payment. (Types are configured on the server).
- The Payment Amount is the amount the patient is paying
- If they have any available credit, this will be listed under the Payment Amount
- There can only be a Payment Amount less than the Total, if the patient has sufficient available credit to cover the difference.
- The amount of credit is shown under Credit Used
- The change required is the amount of change to give to the patient
- It is only possible to finalise a prescription when payments are enabled, when the payment amount is a valid value
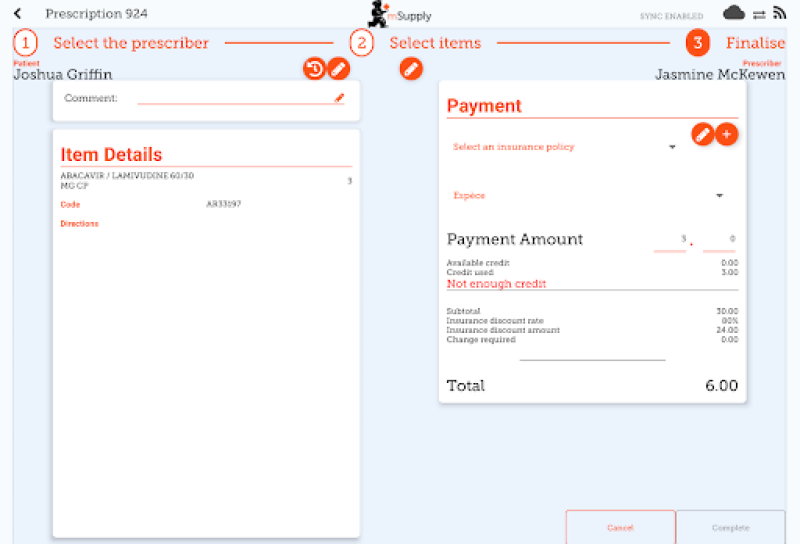
Here's an example if the patient doesn't have enough credit:
And here's an example of where the payment gave you more in cash than the amount to pay, and you need to give them back change:
Insurance
If the server has insurance providers enabled, the mobile store will also.
This will enable the insurance drop-down list and the add button (The orange “plus” button to the right):
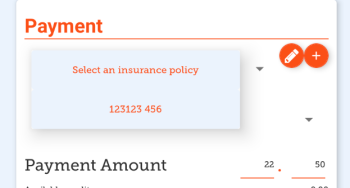
When entering the payment details, if the patient has an insurance policy, you can select it from the drop-down list:
You can use the Edit (the “pen”) or Add (the “plus”) buttons to add or edit insurance policies.
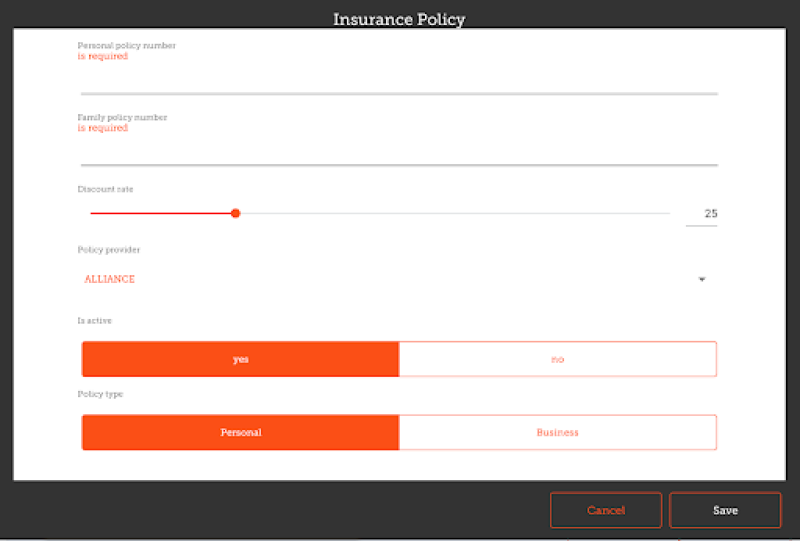
If you click the Add button you can add an insurance policy:
The Save button is only enabled when you've entered a valid value in each field that is labelled as “required”.
If you have set up transaction categories on the server, then you'll be able to choose one at the top left of the window:
| Previous: Indicators | | Next: The Cash Register |
