Ceci est une ancienne révision du document !

(supprimez ce paragraphe une fois la traduction terminée)
Équipment de la chaîne du froid
Configuration du module des Vaccins
Le mode Vaccin est visible seulement si le dépôt est configuré correctement sur le serveur. Voyez comment ici
Permissions
- Msupply a besoin que bluetooth soit activé sur votre appareil pour pouvoir y synchroniser les températures. Nous essaierons de l'activer chaque fois que nous essayons de nous connecter avec vos senseurs, mais il y a certains cas pour lesquels nous ne pourrions pas le réactiver! (Par exemple, s'il est brisé ou que votre appareil n'a pas bluetooth!)
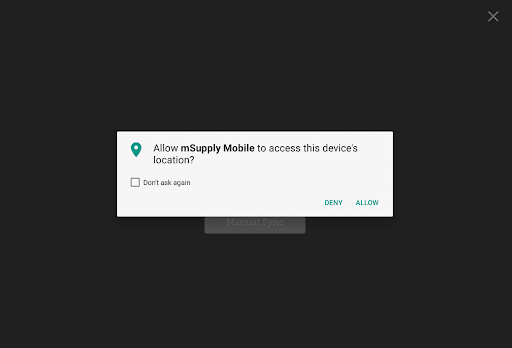
- mSupply devra avoir accès à votre location pour activer le contrôle de la température [Pourquoi? Nous ne le savons pas, demandez à Google!]
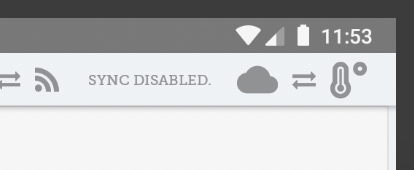
- Lorsque l'un ou l'autre est désactivé, la synchronisation de la température sera désactivée comme ici:
Pour activer les permissions pour la location, vous pouvez soit l'activer dans les paramètres de votre appareil ou manuellement activer cette permission chaque fois à l'exécution. Si vous n'avez pas accès aux paramètres de votre appareil, contactez le soutien à la clientèle de mSupply.
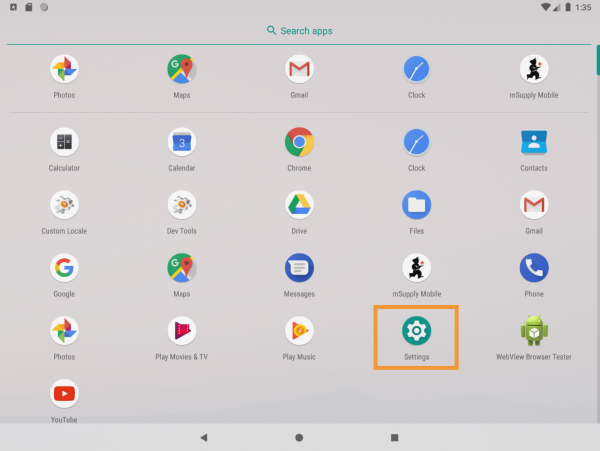
- To enable this in your device settings (example below for a Lenovo E10 tablet):
- Go to your App Settings:
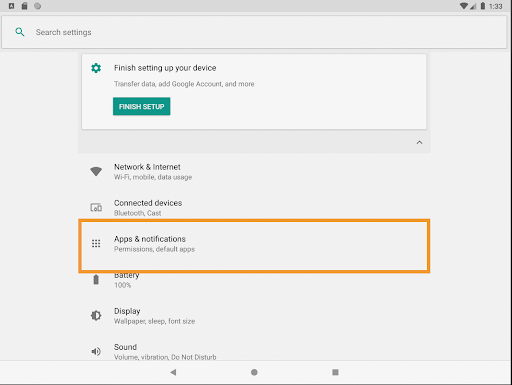
- Find the area for managing permissions (usually the Apps and Notifications area).
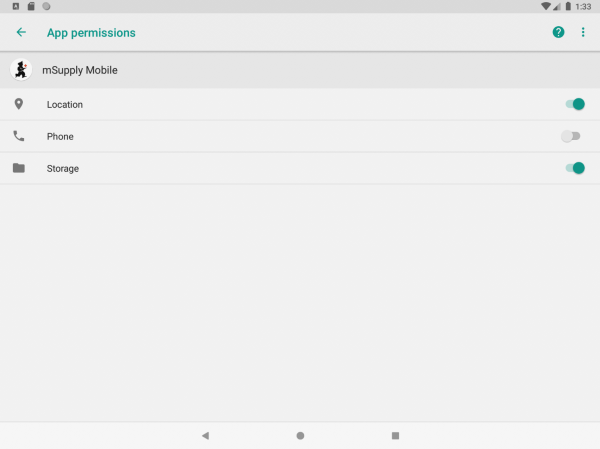
- Tap on mSupply mobile. After finding msupply Mobile…
- Enable the location permission!
- Alternatively you can try to manually sync temperatures. If you haven’t already given location permission, we’ll ask for it now. Without enabling this permission, we can’t sync temperatures. We will try again about every 10 minutes automatically, but we don’t want to disturb you with a request to turn it on each time, so we’ll only show it when you try to manually sync temperatures without the permission enabled.
- If you do check “Don’t ask again” - we can’t! So you’ll have to follow the process above to manually grant us the permission to see your location.
Using Vaccine module
Enabling the Vaccine module will change the look of your menu page, adding an extra Vaccines button.
Supplier Invoices
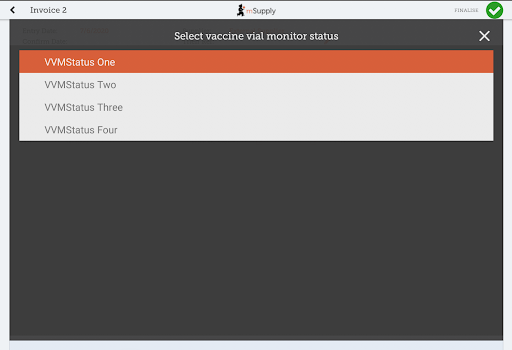
With vaccine module enabled you automatically get a few extra columns on a supplier invoice - the Location and Vaccine Vial Monitor (VVM) status columns.
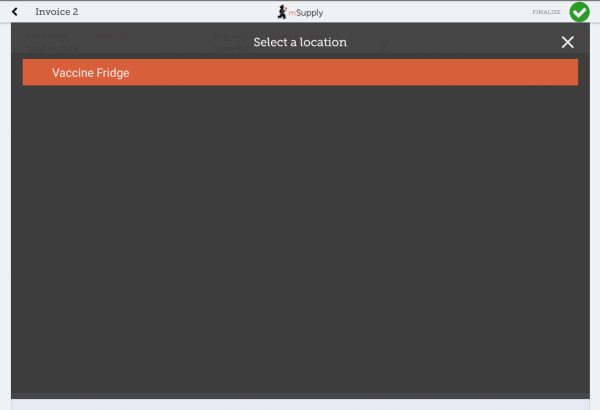
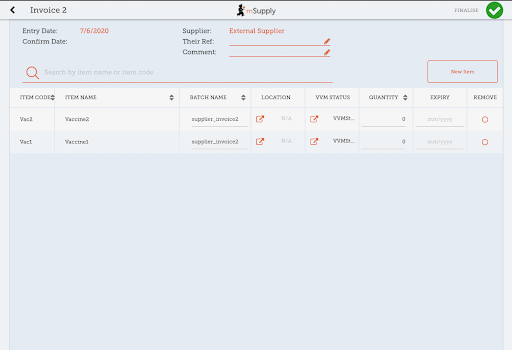 You can select a location by tapping on the arrow icon in the Location cell. This will allow you to choose a location from a list. The available locations are restricted by the item's restricted location (set up on desktop).
You can also change the Vaccine vial monitor status - this defaults to the lowest level, but can be edited by clicking on the arrow icon in the VVM Status column.
Customer Invoices
Vaccine module automatically adds two extra columns on a customer invoice - the Doses and Breach columns.
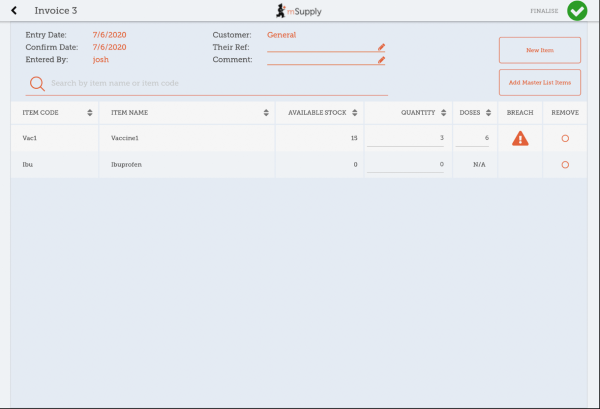
- The Doses column is for the number of doses actually used (so we can account for open-vial wastage). It will automatically get populated by the item quantity * number of doses in a vial, for convenience, but you can also edit it! There is a maximum limit of the number of doses in a vial for that vaccine * the quantity, though.
- The Breach column shows when a vaccine item has been in a temperature breach. Note that without entering a quantity into the customer invoice for the item, we don’t know exactly what batches are being issued, so the breach icon may not show up yet.
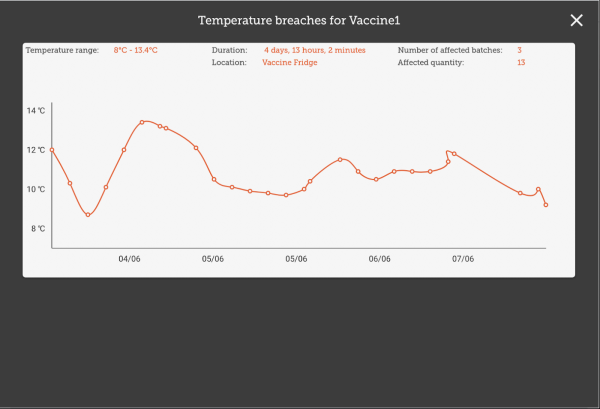
- If the breach icon (an orange triangle with an exclamation) does show for a row, this signals that the stock line has had a temperature breach. Tapping the icon will bring up a graph of the temperature breach. In the example below, the fridge seems to be broken, probably not a good idea to use this batch!
Supplier Requisitions
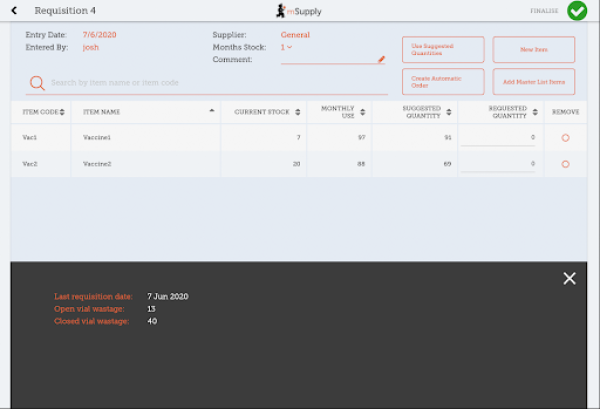
Tapping on a row in your supplier requisition will show you the date of the last requisition for your vaccine, as well as other details such as the open and closed vial wastage since the last requisition.
Stocktakes
Tapping on a stocktake row for a vaccine item will also show the additional columns for Doses and Breach.
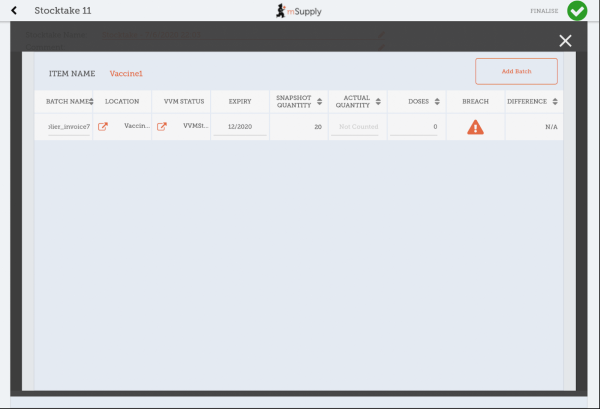
Here, you can adjust the quantities of your vaccine if needed, change the location, or if the vaccine vial monitor status has changed, you can update that here. You can also view the breaches the batch has been in to help you make decisions!
Vaccine module
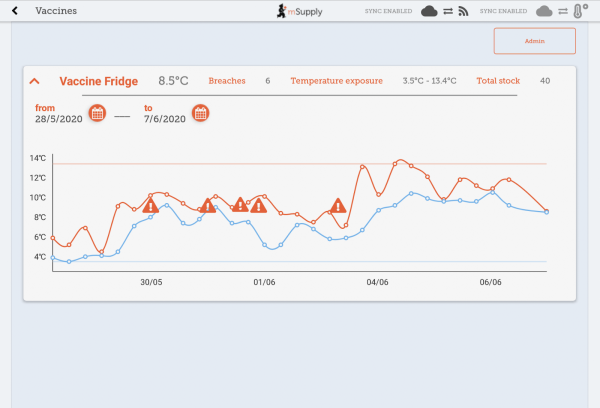
Tapping on the Vaccines button in the menu page will bring you to a list of all your fridges which have a sensor attached. This is where you can view the temperatures of the fridge, as well as other details such as how much stock is in the fridge, or the temperatures it has been exposed to. You can adjust the dates to see a more higher overview of temperatures, or lessen the range to get more fine grained details on the temperatures.
- The blue line is the minimum temperature at that time, whereas the red line is the hottest temperature.
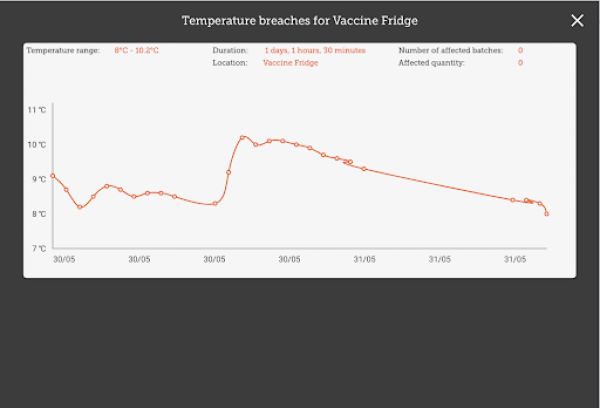
- The hazard icons indicate a temperature breach. You can tap on the hazard icons to view more fine-grained detail on that particular breach.
- Here you can see there was a long breach - lucky there were no vaccines in the fridge at that time!
Admin
If you are an admin you will be able to see a button for opening the admin page.
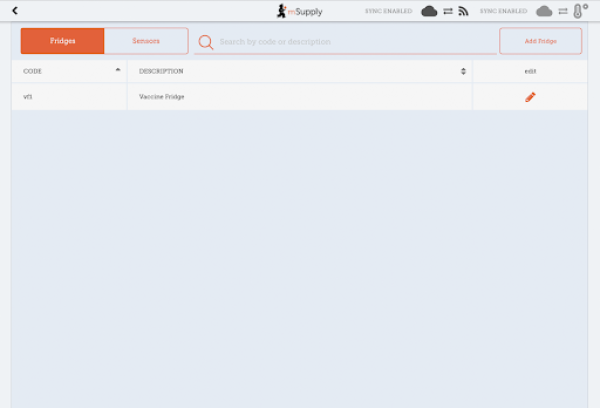
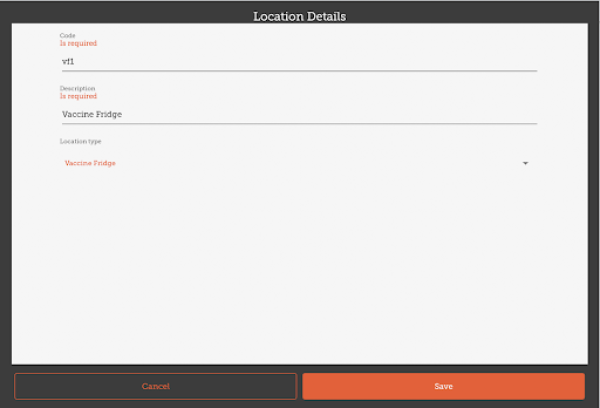
This is where you can make adjustments to your fridges and sensors, as well as discover new sensors through your bluetooth adapter. You can edit locations through the Edit button - note that the location types of locations must be created on the primary server.
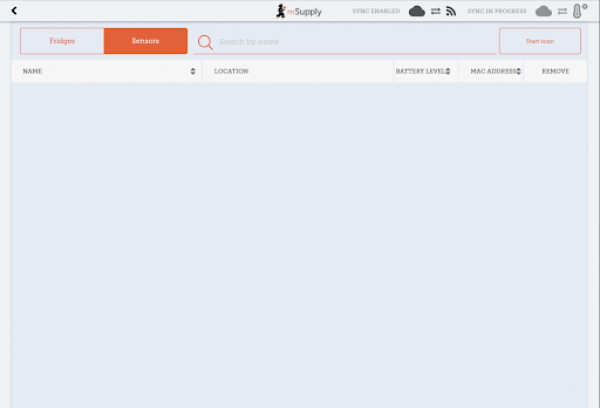
You can also view the sensors you have set up here:
| Previous: The Cash Register | | Next: Mobile Settings |
