Stocktakes (Program)
You would like to perform a stocktake for all the items in a program.
You need to create a Program Stocktake, which will automatically populate your stocktake with items in the program.
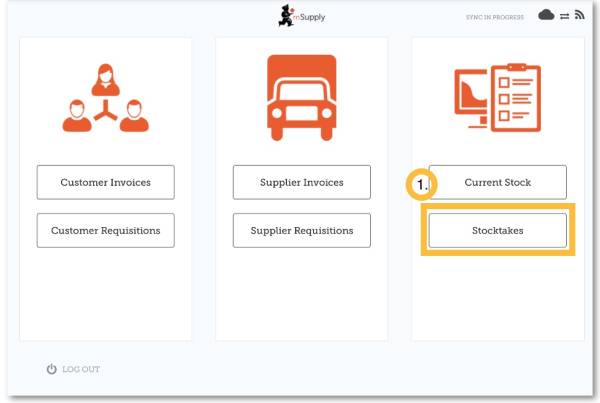
Click on Stocktakes
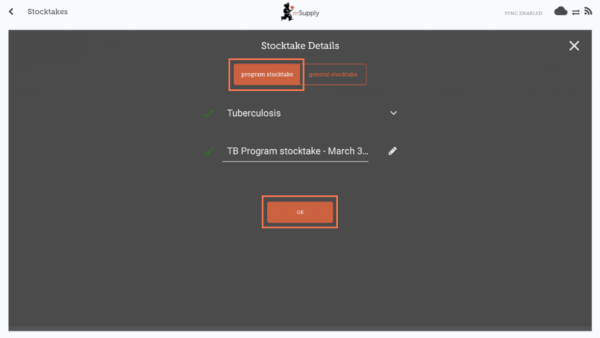
When your store has access to at least one program, creating a Stocktake will prompt you to choose from either a Program Stocktake or a General Stocktake.
Note: In the Program Settings section of the master list - one of the Tags must be assigned to the store you are working in.
(To create a regular stocktake, click the General Stocktake button and continue as usual.)
Let's create a program stocktake…
Click on Program Stocktake
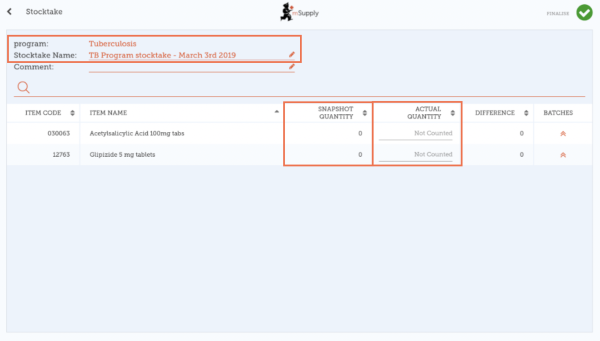
This will bring up the Stocktake Editor
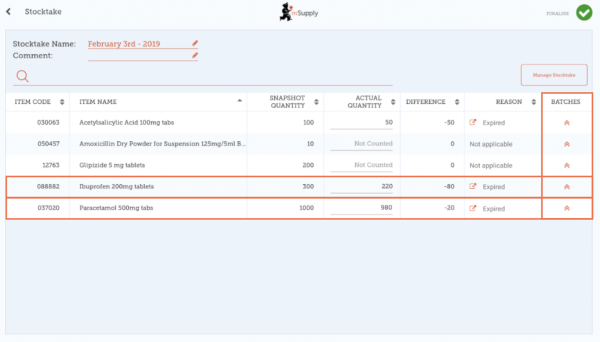
The stocktake is pre-populated with items from the program.
You cannot add additional items to a Program Stocktake.
The Stocktake Editor lists each item, its Snapshot Quantity and its Actual Quantity (from the physical count).
The Snapshot Quantity is what the system THINKS you have. If it is correct (when compared with your physical count), you don't need to do anything!
The Actual Quantity is what you have actually counted. You can change this by clicking in that column and typing in the correct quantity.
For each item, compare your physical count with the Snapshot Quantity
Update incorrect item quantities by clicking in the Actual Quantity column.
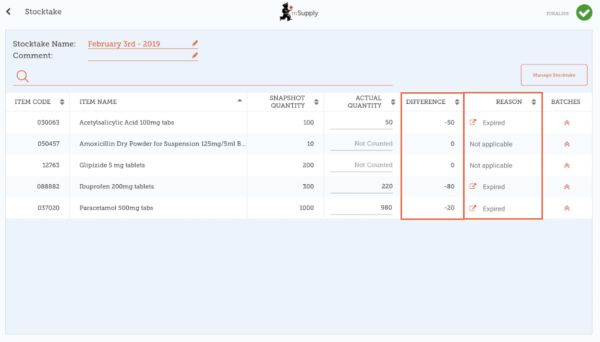
If you change the amount of stock you have in the Actual Quantity column, this variation will now show in the Difference column.
This can take some time but remember - if the Snapshot Quantity is correct, you don't need to do anything!
If prompted, enter a reason for inventory adjustments
If your stocktake screen shows a Reason column, you must enter a reason for any positive or negative inventory adjustments.
Options must be enabled for Stocktake Line Adjustments on the mSupply desktop server and synced to mSupply Mobile to enable this feature.
If the Actual Quantity entered is different from the Snapshot Quantity, you will be prompted to select a Reason for the Difference from a standard list. You will not be able to continue until a reason is selected.
To change the reason, click on the cell again.
Edit batch-specific information
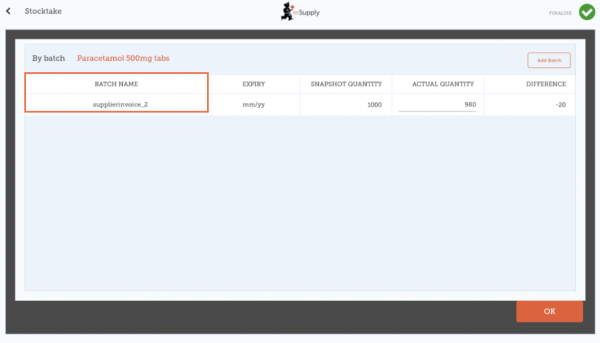
You can adjust batch-specific information or add new batches by clicking the item's Batches icon.
In this example there is only one batch of paracetamol.
If there are multiple batches:
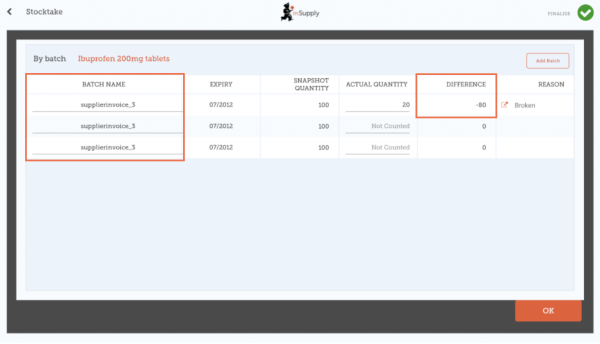
- Inventory adjustments will be automatically made to the batch that arrived first (i.e. first in - first out).
- In this example there are three batches of ibuprofen. The Snapshot Quantity was 300 and the Actual Quantity was 220. The Difference of 80 was automatically taken away from the batch that arrived first. However, this can be manually changed in this screen.
- The inventory adjustment reason selected will automatically apply to all batches.
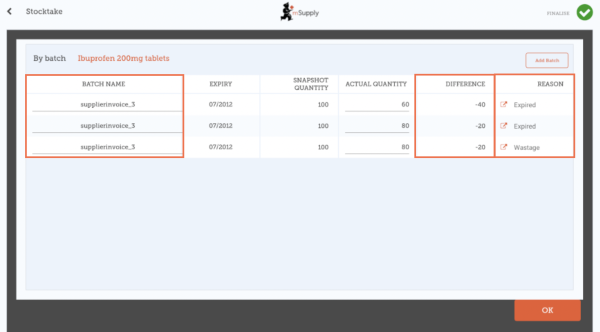
- However, separate reasons for different batches can be manually changed in this screen. In this example we have updated the inventory adjustment of 80 among the batches of ibuprofen, with separate reasons for each batch.
When you are finished making changes in the Batches screen, click OK.
Note: The main stocktake screen will only show the most common reason among the batches for an item's inventory adjustment.
When you are finished...
Click Finalise.

This will update all your stock levels to match the quantities you have entered in the Actual Quantity column.
Like always with mSupply Mobile, you don't need to be connected to the internet to do this - the information will sync in the background when internet becomes available.
| Previous: Stocktakes (General) | Next: The Mobile Dashboard |

