Esta é uma versão antiga do documento!

(remova este parágrafo quando a tradução terminar)
4. Configuração do local para Armazém ou Distribuição
Configuração da visibilidade dos itens com Listas Mestres
- Clique em OK
- Clique em OK novamente
Configuração da sincronização com o registro para SYNC
Se o local for criado usando o método store_create_from_name, um registro de SYNC for especificado para onde novo local estará Ativo (Active), então tudo que precisa ser feito a seguir é:
- Alterar o tipo de sincronização do novo local no servidor central para Remoto (Collector) (informando que ações realizadas para esse local devem ser coletadas e sincronizadas com o Tablet)
- Configurar os tipos de sincronização com os outros locais (com os quais o novo local estará solicitando e/ou enviando itens) para os tipos de Transferência (Transfer) ou Remoto (Active/Collector) - dependendo se são locais ativos no servidor ou remotos (por exemplo outro mSupply Mobile).
- Para editar as configurações de sincronização:
- No servidor central: Especial > Listar locais (Special > Stores)
- Clique duas vezes no local para abrir a janela
- Na aba Sincronização (Synchronization)
- Clique no botão pra desbloquear (Click to unlock) e insira a senha de administração
- Na tabela abaixo, encontre o número do registro de SYNC (Sync ID) que foi criado para o seu local e marque a caixa de seleção na coluna Local. Isto ira automaticamente alterar o tipo de sincronização (Sync type) do local para Remoto (
Active/Collector)
- Selecione na caixa de seleção acima o tipo de sincronização como Remoto (
Collector) - Clique em OK
Visibilidade do novo local para os outro locais
- Edit the 'name' associated with the Store and configure visibility to other Stores appropriately
Custom settings
| Setting name | Allowed Value(s) 1) | Description |
|---|---|---|
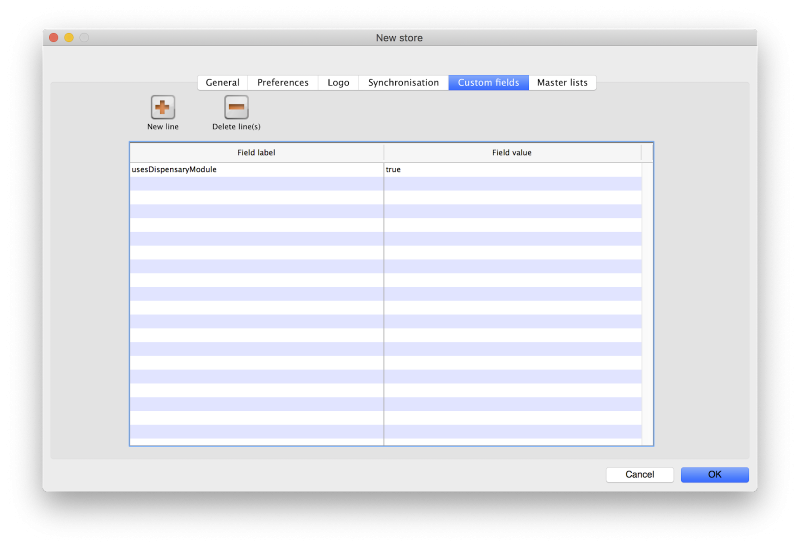
| usesDispensaryModule | true or false | Needs to be set to true if dispensing (see below) |
| usesDashboardModule | true or false | Needs to be set to true if using the dashboard |
| usesVaccineModule | true or false | Needs to be set to true if using the vaccines module |
| usesCashRegisterModule | true or false | Needs to be set to true if using the cash register |
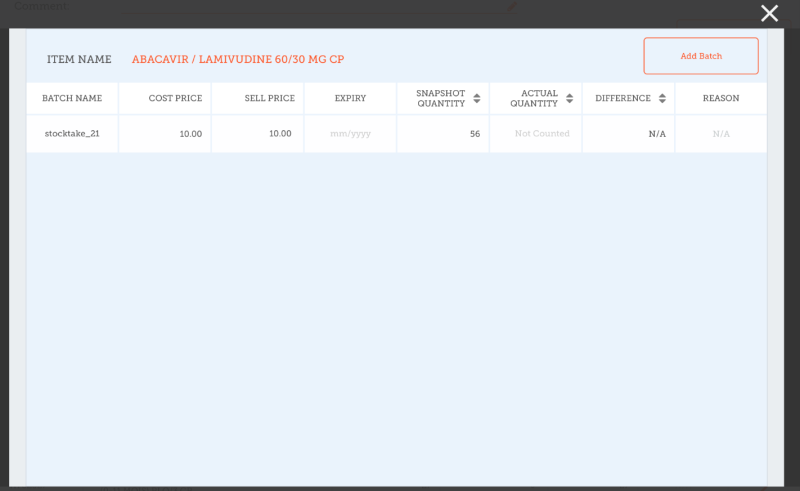
| usesPaymentModule | true or false | Needs to be set to true if handling cash payments. There are some (good!) side effects if this setting is true: The sell and cost price columns are shown on Supplier Invoices and are also shown when editing batches in a stocktake where the sell price is editable. See below for examples. |
| usesSupplierCreditModule | true or false | Needs to be set to true if allowing returns from the stock page, which in turn allows supplier credits |
| usesPatientTypes | true or false | If set to true then you can choose between “Inpatient and Outpatient” when dispensing. The data is stored in the transact.user1 field. Of course, usesDispensaryModule must be set to true for this to have any effect (see above) |
| monthsLeadTime | number (0) | The months of lead time - will be multiplied by 30 to use in mobile as months of lead time |
| monthlyConsumptionLookBackPeriod | number (12) | The number of months to look back when calculating average monthly consumption (AMC) |
| monthlyConsumptionLookEnforceLookBackPeriod | true or false | if True, then the full lookbackup period will be used, even if there is no consumption in those periods. We don't recommend this, but it's here to comply with the rules in some countries |
Other configurations that then affect how mobile behaves
| Item | Description |
|---|---|
| Programs | If you have a master list configured as a program, in mobile you will then be able to perform stock takes by program or supplier requisitions. |
| Reasons | If you have BOTH positive and negative inventory adjustments, have to apply a reason to stocktake lines with a difference != 0 |
| Prescription Categories | If you have transaction categories with type of “prescription” mobile will display a drop down list of prescription categories to select from |
| Insurance Providers | If you configured an insurance provider, then mobile will give you the ability to choose a policy, and to edit and create them at the end of a prescription |
| Payment Types | If you have configured any payment types, they’ll show up in a list at the end of a prescription |
Dispensary mode
- The mobile store needs to have the following field in Custom Fields for the dispensary to be visible in mobile
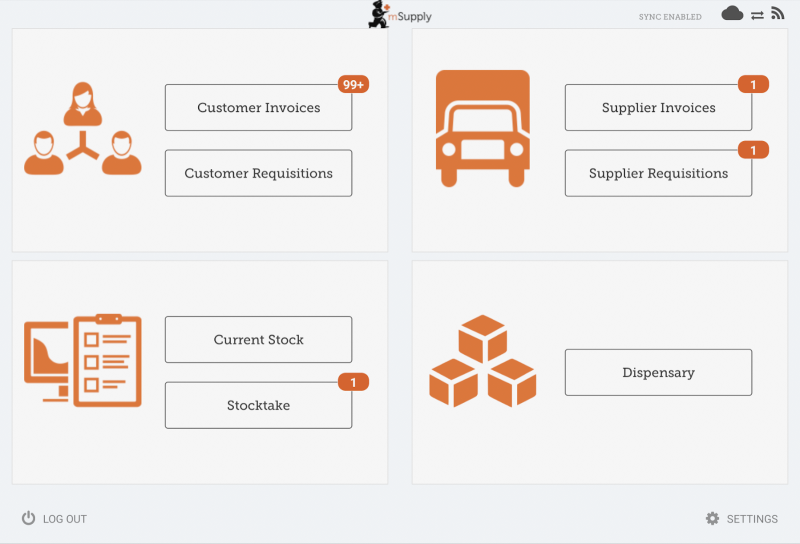
Of course you will need to synchronise mSupply mobile with the server before the mobile device receives these configuration settings. After sync, your Navigator window will look like this
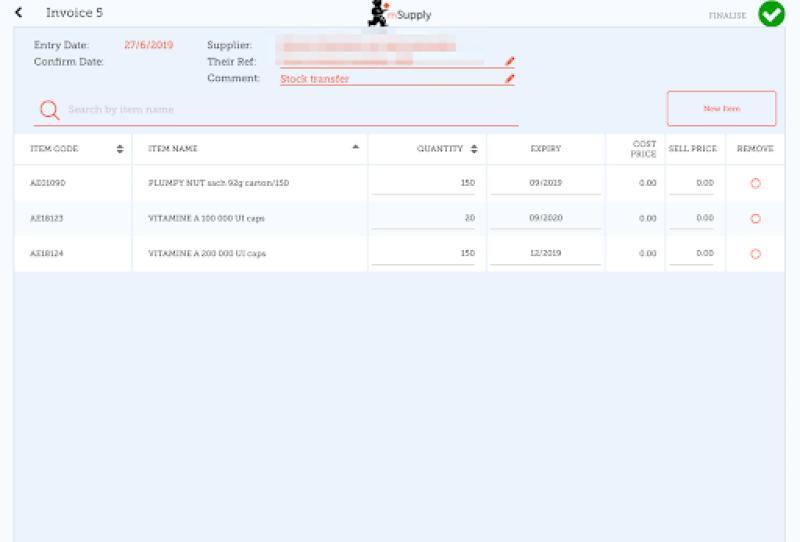
When the Payments module is on
The cost and sell price are visible on supplier invoices:
The cost and sell price are visible when doing stocktakes:
| Previous: 3. Create the Store | | Next: 5. Setting up the Users to access the store |


