Table of Contents
Excel report e-mail scheduler
Generate Excel reports from mSupply dashboard. Email the reports to custom created user-groups on pre-defined schedule. Supported Grafana version is later v8.0.0
This is a custom plugin which will need to be installed on your server. Contact mSupply support if this plugin is not available to you.
To use this plugin, the user needs to have Grafana administrative rights. The plugin icon does not show in the sidebar for non-administrative accounts. Therefore, if a local user needs to configure the Excel report e-mail scheduler, their user needs to be configured to have Grafana administrative rights. Please contact support@msupply.org.nz to arrange this.
Initial Plugin Setup
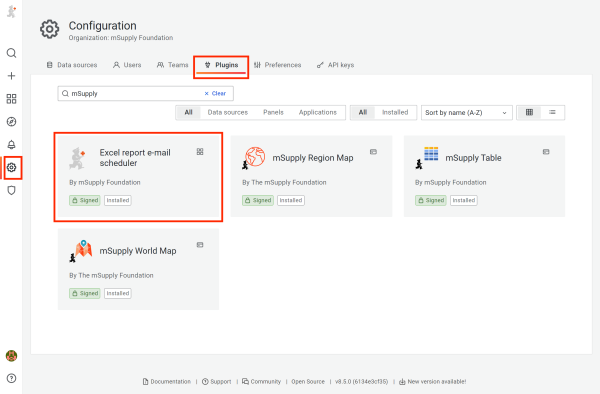
- Click on Settings on the sidebar menu (on the left-hand side of the mSupply Dashboard).
- Select the Plugins tab.
- Search for “mSupply”.
- Click on Excel report e-mail scheduler.
The App Configuration window will open and you will need to complete this form before you start to use the reporting functionality.
Click Enable for the plugin.
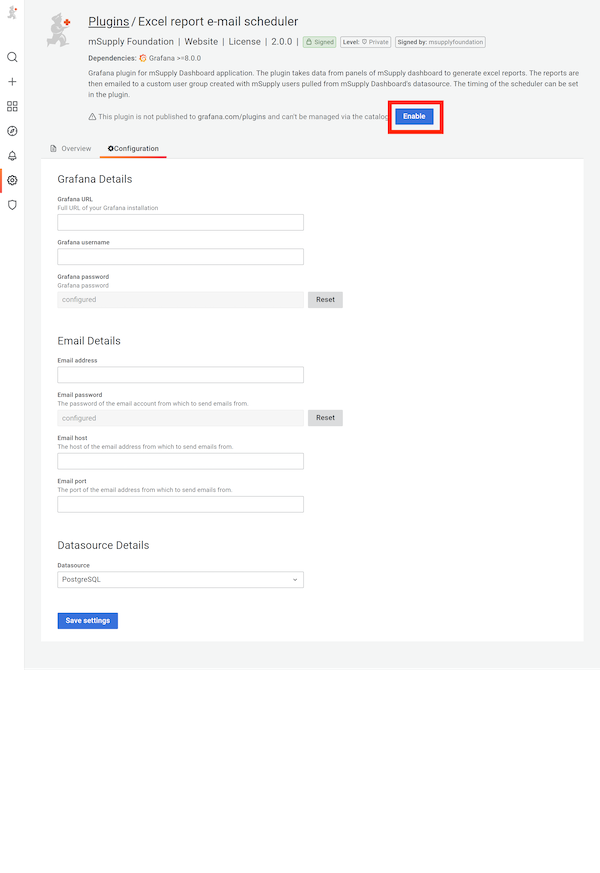
Once enabled, the mSupply icon will be displayed on the sidebar menu above the settings button.

Please enter your administrator Grafana Details:
- Username and password
- URL for your mSupply Web Dashboard
Please enter the Email Details for the account from which emails will be sent:
- Email address and password
- Email host and port (from your email provider: this will be the same details that you would enter when creating a new email account)
Your email provider's security settings may require additional steps to allow email setup.
For Datasource, please select the source location for your mSupply data. In most cases this will be PostgreSQL. If you are not sure, please check with your mSupply consultant.
Once completed, please select Save settings.
- If the form is incomplete or the information provided is incorrect, you will receive an error message on submission. Please follow the instructions given in the error message.
- On successful submission, you will receive the following message:

Selecting Disable will deactivate the mSupply plugin and you will need to repeat the above in order to enable it again.
You are now ready to get started creating Reporting Groups!
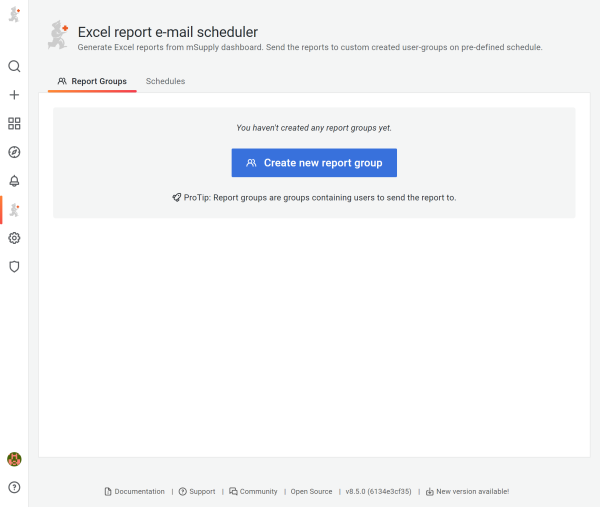
Setting Up a Report Group
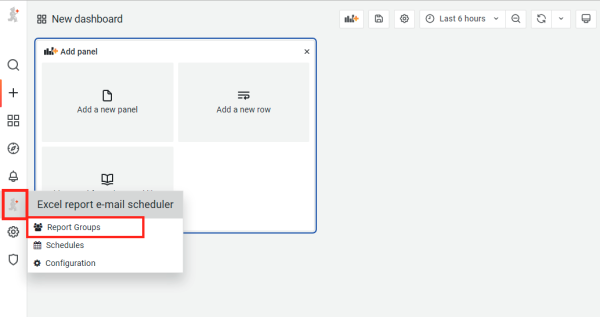
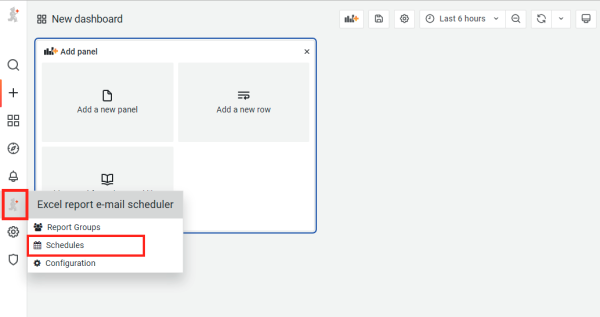
To access report groups, select the mSupply icon from the sidebar menu and select Report Groups from the drop-down menu.
In the following window select Add report group. This will create a New report group as seen below – click on this row to edit the report group details.
Edit report group details page:
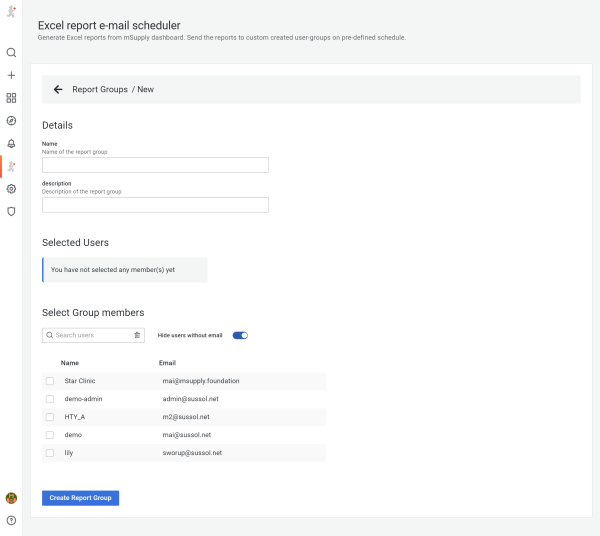
In the Edit details section there are free-text boxes for:
- Name
- Group description
Selected Users
- List of selected users shown here
Select the users that you want to be in your report group.
- A list is provided of all mSupply users
- You can show only mSupply users with an email address when Hide users without email toggle is on.
New users (or changes to a user’s details) will not be updated from mSupply into the Dashboard immediately. It is depending on the timing of the dashboard export scheduler in mSupply. If you require an immediate update for Reports, please complete a manual export of user table from mSupply to the Dashboard.
Click on Create Report Group or Update Report Group (When you edit) to save.
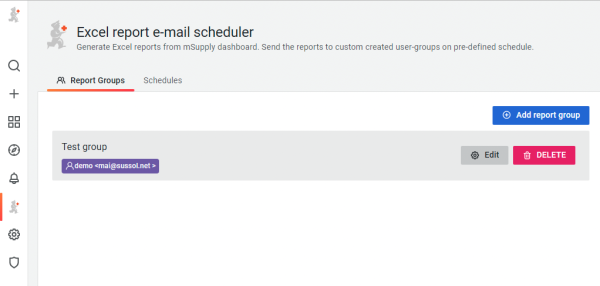
When you hover your mouse over the group, Edit and DELETE buttons appear.
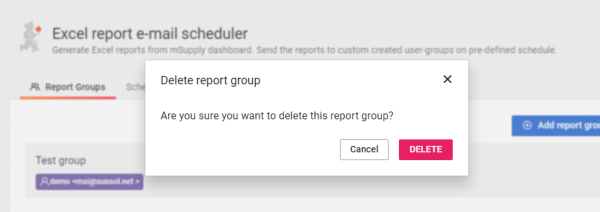
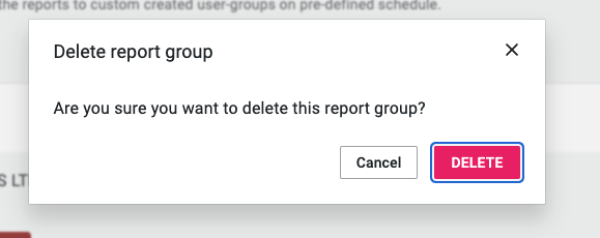
Delete will remove the report group. You will receive a prompt to confirm deletion.
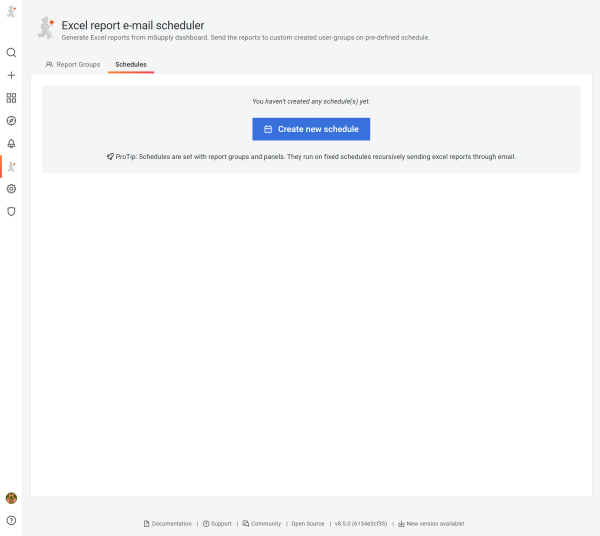
Setting Up a Report Schedule
To access Report schedules, select the mSupply icon from the sidebar menu and select Schedules from the drop-down menu.
In the following window select Create new schedule. This will create a New report schedule as below – click on this row to edit the schedule details.
Edit report schedule details page:
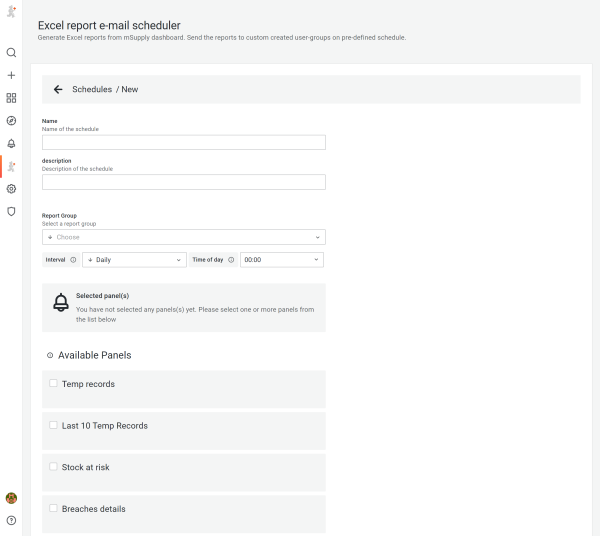
In the Edit details section:
- Name: free-text box that will also be the email subject.
- Description: free-text box
- Report group: select the name of the group that should receive the report
- Report interval: select the required reporting period from the drop-down box
The emails will be sent according to the selected interval from the time the report schedule is created. For example, if a daily schedule is set up at 9am on 1 January 2021, the email will be sent every day at 9am from 2 January 2021.
Then select from the Available Panels to be displayed in the report:
- Any number of panels can be selected. Each panel will be on a separate worksheet in an attached Excel workbook - refer Report template.
- Only “table” panels are supported.
For each panel selected, you will also need to specify the Variables to be displayed in the emailed report. This is done via the drop-down boxes that will be displayed once a panel is selected as shown in the below example for Expiry Items.
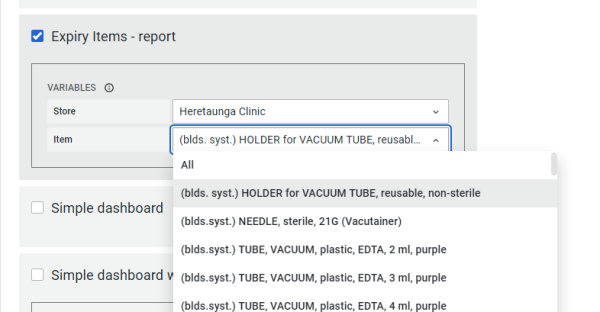
Using the drop-down boxes, you can choose the variables (in this case Store and Item) that you want displayed in the emailed report. Only the variables displayed within the Report Schedule screen are available for each panel.
The Grafana format of variables must be in the form: ${variable} or ${variable:sqlstring}. Other formats are not supported for dashboard reports. 1)
Grafana macros are not supported with the following exception:
- The $ timeFrom and $ timeTo and $ timeFilter macros are supported using a Lookback variable. The $ timeTo date is set to date of report creation. The $ timeFrom will then be calculated as ($ timeTo – Lookback).
- For example, if you set a lookback period of 7 days and create a daily report starting on 1 January 2021. The first report’s $ timeFrom will be 24 December 2020 and the $ timeTo will be 1 January 2021. The second report’s $ timeFrom will be 25 December 2020 and the $ timeTo will be 2 January 2021. 2)
Press Create schedule button on the bottom of the page.
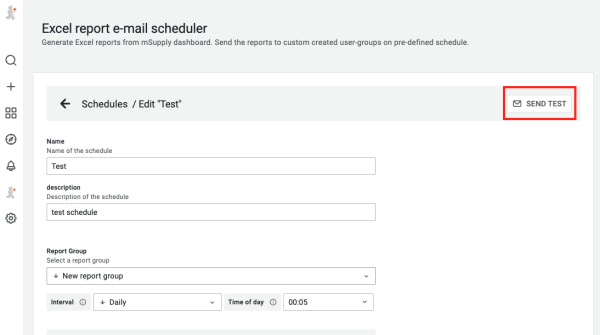
Once you saved the scheduler, you can press Send Test button (top right corner) from the edit schedules. Please note:
- Send Test will not affect the timing of the schedule (the timing of the schedule is dependent on the time you save and close the report schedule)
- Send Test will send the email to all users in the report group!
DELETE will remove the report schedule. You will receive a prompt to confirm deletion.
Report Template
The panels selected in a report schedule will be sent via email in an Excel workbook:
- Each panel will be on a separate worksheet.
- Each worksheet will display in the title:
- Date of Creation
- Name of the Panel
1)
For more information on variables please refer to Grafana variables
2)
For more information on macros, please refer to Grafana macros